1. Zoho Basics - Logging In / Webpage Navigation
Logging Into Zoho
Follow these steps to access your Zoho Books account. Your login credentials will be provided to you via email.
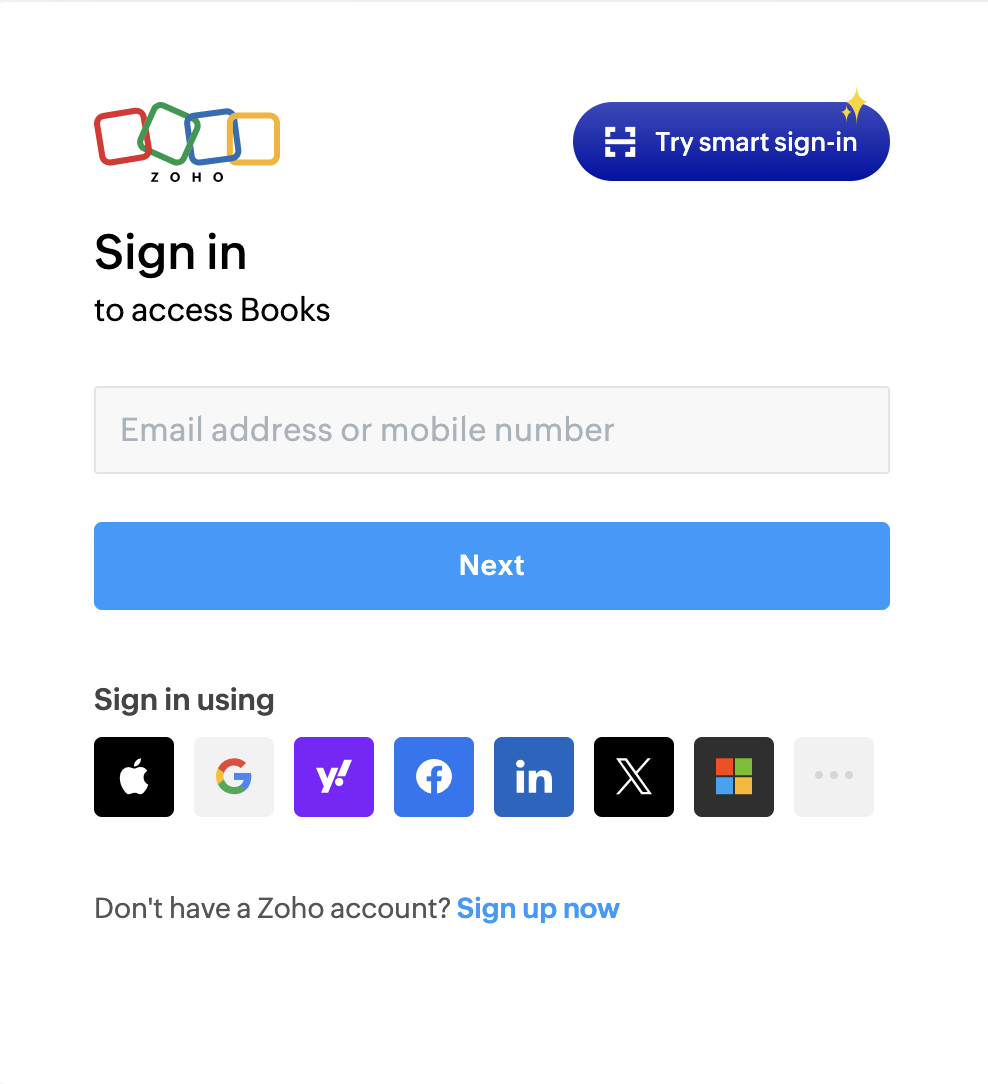
Step-by-Step Login Process
- Navigate to the login page: Go to https://accounts.zoho.com/signin?servicename=ZohoBooks
- Enter your credentials: Use the email address and password provided to you via email
- Complete any security verification: If multi-factor authentication is enabled on your account, enter the code sent to your device
- Access your dashboard: Once logged in, you'll be taken to the Zoho Books dashboard
Webpage Navigation
Understanding the Zoho Books interface layout and how to navigate efficiently through the platform.
Top Navigation Bar
The top bar provides quick access to essential functions and tools across Zoho Books.

| Element | Purpose |
|---|---|
| Recent Activities | Access the last few items you were working on quickly without needing to re-navigate to that page |
| Search Bar | Search anything in Zoho. Click the magnifying glass icon to switch between search categories |
| Quick Create Button (+) | Allows you to quickly create any type of document in Zoho (invoices, quotes, customers, etc.) |
| My Account | Access your account settings to update your profile picture, email address, mobile number, and multi-factor authentication |
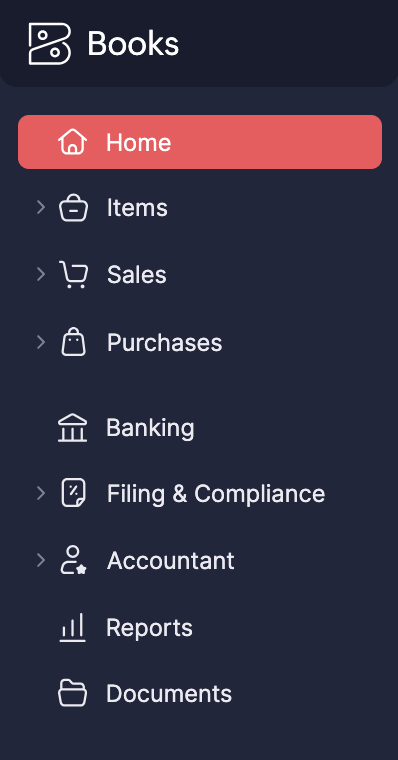
Side Navigation Bar
The left sidebar provides access to all major sections and features within Zoho Books.
| Section | Purpose |
|---|---|
| Home | Dashboard overview with key metrics and Zoho Updates |
| Items | List of products and services in Zoho - use these when creating invoices and quotes |
| Sales | Manage Customers, Quotes, Invoices, and Payments |
| Purchases | Manage Vendors, Expenses, and Bills |
| Banking | Quick overview of where all incoming and outgoing money currently sits |
| Filing and Compliance | Access Sales Tax Reports and generate 1099 forms |
| Accountant | All accounting tools including Chart of Accounts, Budgets, Fixed Assets, and more |
| Reports | Generate various business reports - similar to QuickBooks reporting features |
2. Setting Up Card Reader
This section covers the complete process of setting up and configuring your card reader for payment processing. Follow these steps carefully to ensure proper installation.
What's in the Box
Each team member should have received 3 boxes for their card reader:
| Box | Contents | Notes |
|---|---|---|
| Large Brown Box | Card Reader Dock | Charging station for the card reader |
| Small Brown Box | Card Reader | Box should have your location name written on it |
| Small White Box | Power Adapter | Powers the dock |
Physical Setup
Follow these steps to set up the hardware:
- Plug in the power adapter: Connect the power adapter to an outlet under your desk or nearby power source
- Connect the dock: Plug the card reader dock into the power adapter using the USB-C connection
- Position the dock: Place the dock on your counter where you want it, facing toward the customer
- Insert the card reader: Place the card reader into the dock - it's now ready for configuration
Device Configuration
Now that the hardware is set up, you need to configure the card reader's network settings.
Powering On the Device
- Pick up the card reader: Remove it from the dock temporarily for setup
- Turn on the device: Press and hold the power button on the right side of the device until the screen powers on
Network Configuration
Once the device is powered on, complete the following steps:
- Open the menu: Swipe right from the left side of the screen to open the main menu
- Access settings: Tap on Settings
- Enter admin pin: Enter the admin PIN:
07139 - Select network: Tap on Network from the settings menu
- Connect to WiFi: Select your shop's WiFi network and enter the password using the on-screen keyboard
- Complete setup: Once connected, close the menu and place the reader back into the dock
Setup is now complete! Your card reader is ready to process payments through Zoho.
3. How to Create a Customer
Adding new customers to Zoho is a fundamental task you'll perform regularly. This section covers all the fields and options available when creating a customer record.
How to Start Creating a Customer
There are multiple ways to begin creating a new customer in Zoho:
- Quick Create Button: Click the + button in the top navigation bar and select "Customer"
- Sales Menu: Navigate to Sales → Customers and click the "+ New" button
- From Quote/Invoice: While creating a quote or invoice, you can create a new customer on the fly
Customer Information Fields
When creating a customer, you'll need to fill out the following information. Fields marked with an asterisk (*) are required.
1. Type *
Select whether this customer is a Business or an Individual.
2. Primary Contact *
The name of the person you are in contact with. Use this field for both individuals and companies - this is the main point of contact.
3. Company Name
Use this field for Businesses Only. Leave blank for individual customers.
4. Display Name *
Choose whether the customer's displayed name throughout Zoho is the Primary Contact name or the Company Name. This affects how they appear in lists, invoices, and reports.
5. Email Address
Optional but highly recommended. Used for sending invoices, quotes, and payment receipts to the customer.
6. Customer Number *
This is a unique identifier automatically generated by Zoho. Do not change this - leave it at the default value.
7. Phone
You can specify multiple phone numbers for a customer:
- The phone number at the top of the form is for the Primary Contact
- Additional contacts can be added in the Contact Persons section (see below)
8. Customer Language
Select the language the customer speaks. This is particularly important for Customer Portals as it determines the language they'll see when accessing their portal (covered in Section 5).
9. Communication Channels
Choose how the customer wants to receive communications:
- Email: Checked by default
- SMS: Customer can opt in to receive text message notifications
10. Other Details
This expandable section contains additional settings:
- Tax Information: Customer tax ID or exemption status
- Payment Terms: Default payment terms for this customer (e.g., Net 30)
- Portal Access: Enable or disable customer portal access
- Bank Account Payments: Set up ACH or direct bank payments
- Documents: Attach relevant customer documents
- Custom Fields: Add any custom information specific to your business needs
11. Address
Specify customer addresses:
- Billing Address: Where invoices are sent
- Shipping Address: Where products are delivered (can be different from billing)
12. Contact Persons
Add additional contacts for the customer account. This is especially useful when a company has one account but multiple people you communicate with.
For each additional contact, you can set:
- Name
- Email address
- Phone numbers
- Communication preferences (separate from the Primary Contact)
13. Custom Fields / Reporting Tags
Currently not configured for customers. You can ignore this section for now.
14. Remarks
Internal notes about the customer. These are NOT visible to the customer - use this for internal reference only.
Saving the Customer
After you've filled out all necessary information, click the "Save" button on the bottom left of your screen to create the customer record.
The customer is now added to your system and available for use in quotes, invoices, and payments!
4. Customer Features Overview
Once you've created a customer, you can access their complete profile to view details, manage transactions, send communications, and more. This section covers all the features available when working with existing customers.
Accessing Customer Details
To view a customer's full profile:
- Navigate to Customers: Go to Sales → Customers
- Select a customer: Click on any existing customer from the list
Once you're viewing a customer's profile, you'll see several options at the top of the page:
- Edit Customer: Modify any of the customer's information
- Create New Transaction: Quickly create an invoice, quote, or other document for this customer
- More Options: Additional actions and settings
Customer Profile Tabs
The customer profile is organized into 5 tabs, each providing different information and functionality:
1. Overview Tab
The Overview tab provides a comprehensive snapshot of all customer information in one place:
- Contact Details: Name, email, phone numbers
- Addresses: Billing and shipping addresses
- Tax Information: Tax ID and exemption status
- Portal Status: Whether customer portal access is enabled
- Contact Persons: List of all associated contacts
- Total Balance: Outstanding balance owed by the customer
- Recent Transactions: Quick view of the most recent invoices, quotes, and payments
2. Comments Tab
Use the Comments tab to write internal notes about the customer:
- Add notes about customer preferences, special requests, or important details
- Comments are internal only - customers cannot see them
- Useful for communication between team members about customer interactions
3. Transactions Tab
The Transactions tab provides a complete, categorized history of all customer transactions:
- Invoices: All invoices created for this customer
- Quotes: All quotes/estimates provided
- Payments: All payments received
- Other Transactions: Any additional transaction types
This tab allows you to review the complete financial history with the customer, making it easy to reference past work or resolve billing questions.
4. Mails Tab
The Mails tab shows a complete log of all email communications sent to the customer through Zoho:
- View when invoices, quotes, and receipts were emailed
- Confirm delivery of important documents
- Track communication history for reference
5. Statement Tab
The Statement tab allows you to generate and share customer account statements:
- Date Range Control: Select the date range you want the statement to cover
- Print: Print a physical copy of the statement
- Export: Download the statement as a PDF or other format
- Email to Customer: Send the statement directly to the customer's email address
Statements provide customers with a complete overview of their account activity, including all invoices, payments, and outstanding balances for the selected period.
5. Customer Portals Explained
Customer Portals provide a secure, self-service dashboard where customers can access their account information, view documents, and manage transactions - all without needing to contact a Patterson Print Shop representative.
What is a Customer Portal?
The Customer Portal is a customer-facing dashboard that individual customers can log into to:
- View their Quotes, Invoices, Payments, and Statements
- Accept or decline quotes directly
- Pay outstanding invoices online
- Upload important documents (e.g., Tax Exemption Forms)
- Access account information 24/7 without calling the shop
How to Enable Portal Access for a Customer
Step 1: Enable Portal Access
There are two ways to enable portal access depending on whether you're creating a new customer or updating an existing one:
For New Customers:
- When creating the customer, ensure the checkbox "Allow Portal Access For This Customer" is selected
For Existing Customers:
- Open the customer profile: Navigate to Sales → Customers and select the customer
- Check portal status: In the Overview section, look for "Portal Status" which will show either "Enabled" or "Disabled"
- Configure access: Click the Cog Icon ⚙️ next to the portal status
- Select contacts: Enable portal access for the Primary Contact and/or individual Contact Persons
Step 2: Customer Receives Invitation
After enabling portal access:
- Email sent: The contact receives an invite email from Zoho
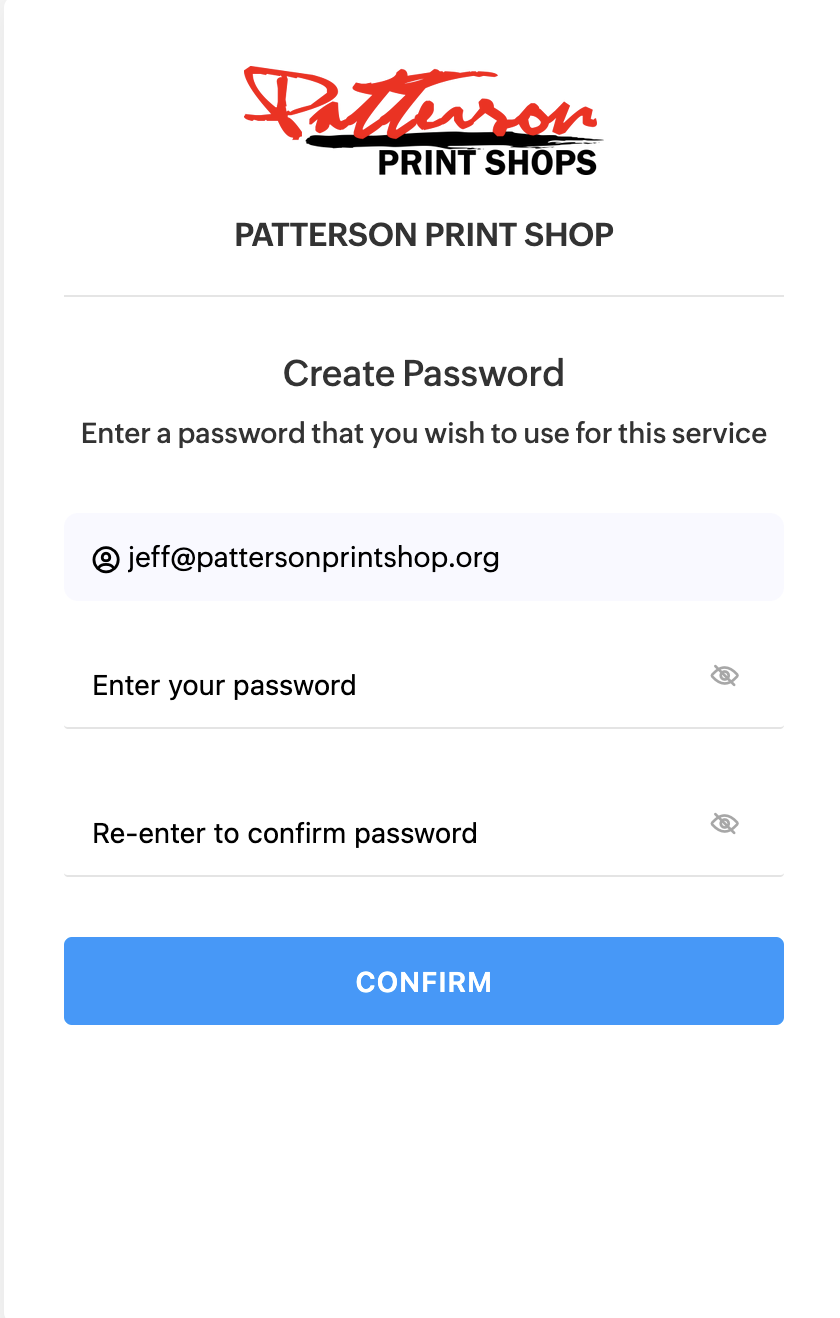
- Customer accepts invite: The customer clicks the link in the email
- Password creation: The customer is asked to create a password for their portal
- Account updated: Once complete, their customer account in Zoho will update to show portal access is active
Managing Portal Invitations
When viewing a customer's account, you may see different portal statuses:
| Status | What It Means | Available Action |
|---|---|---|
| Portal Invite Not Accepted | Customer hasn't completed the invite process yet | Button to Resend Invite |
| Portal Access Active | Customer has set up their portal and can log in | Button to Resend Portal Access Link (if they lost it) |
Troubleshooting: Resetting Portal Access
If a customer loses access to their portal and cannot regain it:
- Disable portal access: Turn off their portal access using the cog icon
- Re-enable portal access: Turn it back on immediately
- New invite sent: This sends them a fresh invite link
- Old credentials invalidated: Their previous login credentials will no longer work
What Customers Can Do in Their Portal
Portal Dashboard
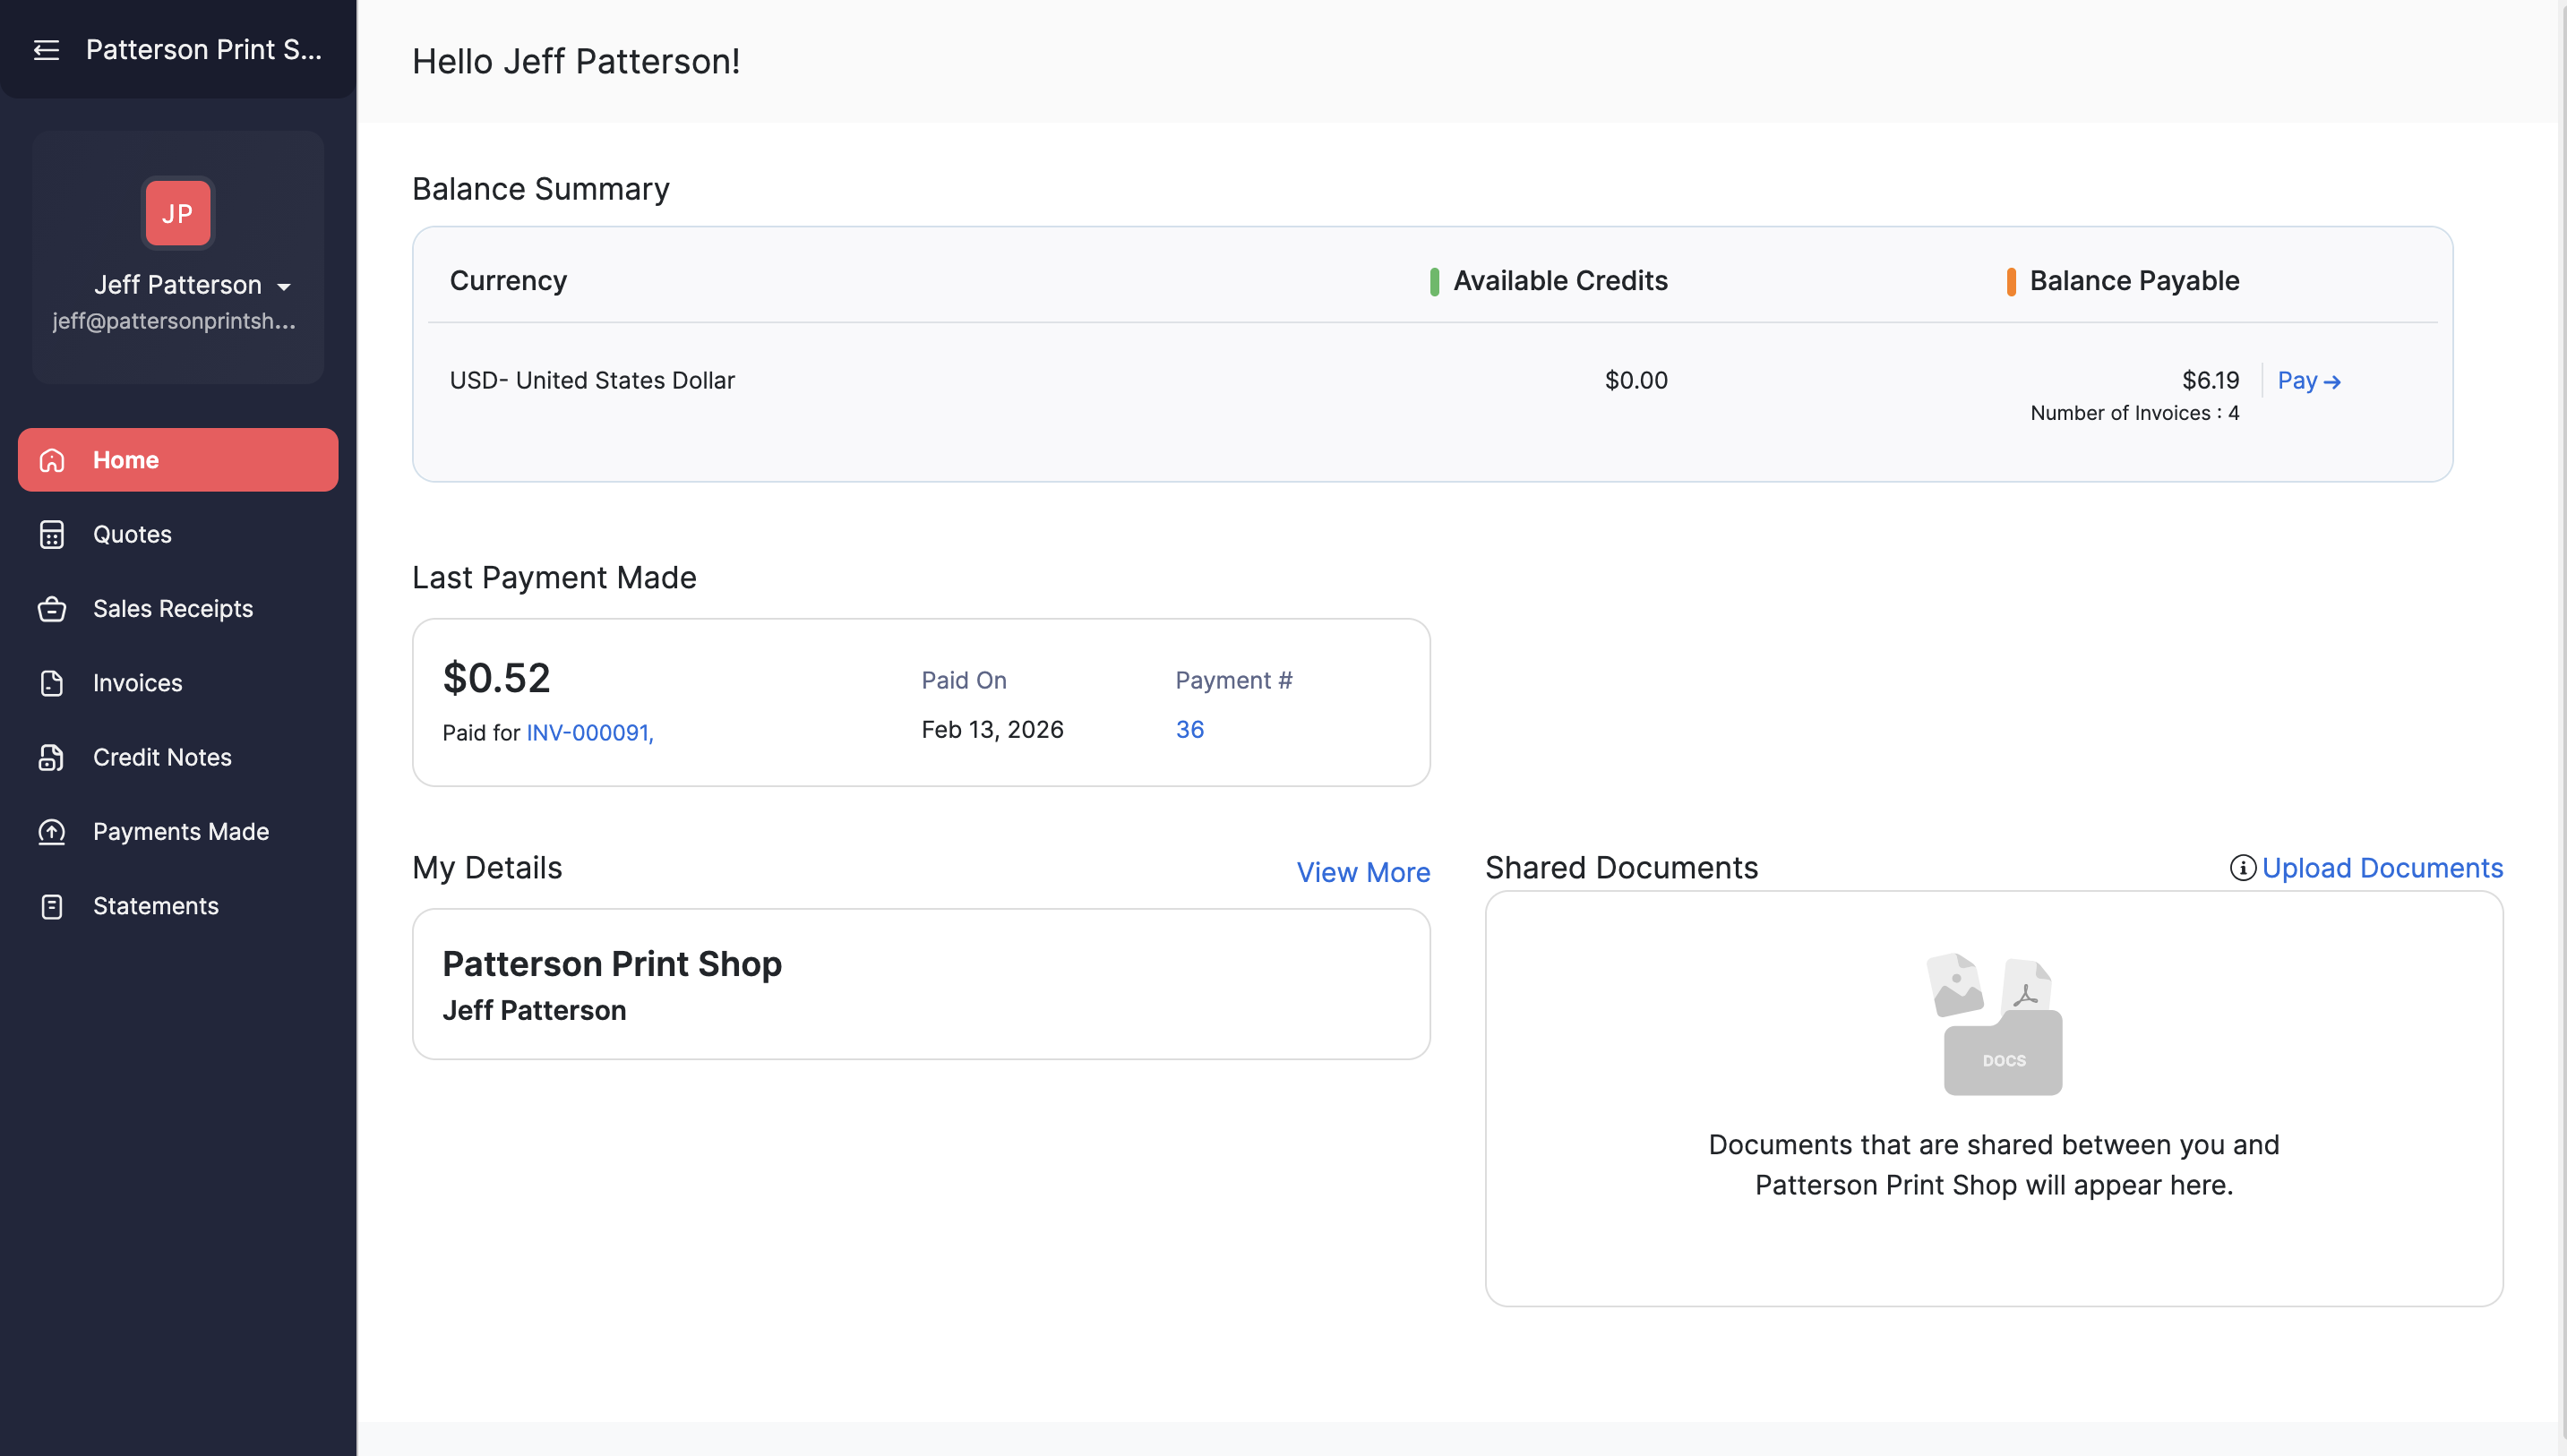
When customers log into their portal, they see:
- Account Balance: Current outstanding balance
- Account Details: Contact information and addresses
- Uploaded Documents: Any documents they've shared with you
- Left Sidebar Navigation: Links to Quotes, Invoices, Payments, and Statements
Quotes Section
Customers can:
- View all quotes you've sent them
- Accept or Decline quotes directly from the portal
- When a quote is accepted/declined, you'll be notified in your Zoho account
Invoices Section
Customers can:
- View all their invoices
- Pay invoices directly from the portal using their preferred payment method
- Download or print invoice copies
Payments Section
Customers can:
- View their complete payment history
- See which invoices have been paid and when
Statements Section
Customers can:
- View their account statements
- Print statements for their records
- Review account activity over time
Portal Footer
The portal includes contact information for Patterson Print Shop in the footer, making it easy for customers to:
- Send an email directly to the shop
- Find phone numbers and other contact details
- Reach out if they need assistance
6. How to Create a Quote
Creating quotes in Zoho is straightforward and similar to QuickBooks, with some powerful additional features. This section covers the complete quote creation process from start to finish.
Starting a New Quote
There are two ways to begin creating a quote:
- Quick Create Button: Click the + button in the top navigation bar and select "Quote"
- Sales Menu: Navigate to Sales → Quotes and click "New Quote"
Quote Fields and Configuration
1. Select a Customer
Choose which customer this quote is for:
- Default search: Search by customer name only
- Advanced search: Click the Red Magnifying Glass icon to search by additional fields:
- Customer Number
- Display Name
- Company Name
- First Name
- Last Name
- Phone
Once you select a customer, their billing address, shipping address, and tax preferences will automatically populate.
2. Choose Location
By default, this will be set to your shop's location. You may change it if the order is for a different shop location.
3. Quote#
Leave this at the default value. The quote number is automatically generated and should not be changed.
4. Reference#
Enter any customer-provided identifier for this specific quote, such as:
- P.O. (Purchase Order) Number
- Job Number
- Any other reference the customer provides
5. Quote Date
By default, this is set to the current date. You may change this if you plan to send out the quote at a later date.
6. Expiry Date
Set when the quote will expire (optional):
- Default: Empty (No Expiry)
- When to set: If you want the quote to no longer be available to the customer after a certain period of time
7. Salesperson
By default, this should show your name. The salesperson field:
- Indicates who will receive commission for the order
- Provides a reference for the customer to know who to contact
- Can be changed if you are not the primary contact for that quote
8. Subject
This is an optional customer-facing field describing what the quote is for. It's useful for:
- Tracking specific jobs or projects
- Finding old quotes later
- Providing context to the customer
9. Item Table
This is where you create your line items, similar to QuickBooks:
- Choose a product: Select from your Items list
- Set details: Configure Quantity, Rate, and Taxes
- Add more rows: New lines are automatically added as you type
10. Add New Row / Add New Header
Click the down arrow next to "Add New Row" to access additional options:
- Add New Row: Standard line item (default)
- Add New Header: Creates a non-line-item header to organize sections
When to use headers:
- Separating different types of work (e.g., "Embroidery" and "Screen Print" sections)
- Organizing items vs. fees (e.g., "Products" and "Service Fees")
- Making complex quotes easier to read
11. Add Items In Bulk
If you know a quote will have many line items, use this option to add multiple items at once instead of adding one at a time.
12. Discount / Shipping Charges
Located above the total, you'll see two fillable fields:
- Discount: Quickly apply a discount without creating a full line item
- Shipping Charges: Add shipping costs without a separate line item
13. Customer Notes
These notes are shown to the customer on the quote. A default customer note is set up, but you may edit it as needed for specific situations.
14. Terms and Conditions
A standard terms and conditions template is already configured. This is available for customers to view on online quotes and invoices.
Saving the Quote
At the bottom left of the screen, you have two save options:
| Option | What It Does | Quote Status |
|---|---|---|
| Save as Draft | Saves the quote for later without sending. You can access it by searching in Quotes or viewing the customer profile. | Draft |
| Save and Send | Opens an email screen where you can update the send from/to addresses, email subject, and choose whether to include the PDF attachment. | Sent (after email is sent) |
After Creating a Quote
Once you've created a quote, you can select it from the Quotes list to access these options:
| Action | Description |
|---|---|
| Edit | Modify the quote details. Note: Already accepted quotes cannot be edited - you must edit the invoice created from it instead. |
| Send | Send the quote via Email or SMS |
| Share | Generate a link that you can provide to your customer to view the quote online |
| PDF/Print | Save the quote as a PDF or print a physical copy |
| Convert to Invoice | Mark the quote as accepted and automatically generate an invoice using the quote information |
Below these controls, you can:
- Preview the quote PDF to see how it will appear to the customer
- View an activity log showing all actions taken on the quote
7. How to Create an Invoice
Creating invoices in Zoho is very similar to creating quotes. Most of the process and fields are identical, so if you need detailed information about filling out standard invoice fields, refer to Section 6: How to Create a Quote.
This section focuses on the key differences between quotes and invoices, particularly around payment types, electronic fees, and invoice-specific options.
How to Create an Invoice
Just like quotes, you can start a new invoice in two ways:
- Quick Create Button: Click the + button and select "Invoice"
- Sales Menu: Navigate to Sales → Invoices and click "New Invoice"
Most fields work the same as quotes (customer selection, line items, discounts, etc.). See Section 6 for details on these standard fields.
Invoice-Specific Fields
Here are the fields that are unique to invoices or work differently than quotes:
Invoice Date
This is the date the invoice was created, or the date a quote was converted to an invoice. By default, it's set to the current date.
Terms
Define the payment terms for this invoice:
- Default: Uses the terms specified on the customer's account (e.g., Net 30)
- Manual override: You can also set a specific due date if needed
Payment Type ⚠️ IMPORTANT
This field has two options and determines whether electronic payment fees are added to the invoice:
| Payment Type | When to Use | Fee Applied? |
|---|---|---|
| Electronic (Card or Online) | Customer will pay by card (in-person or online), Apple Pay, or Google Pay | ✅ Yes - 3% fee added |
| Cash / Check / ACH / Zelle | Customer will pay by cash, check, ACH transfer, or Zelle | ❌ No fee |
Deposit Amount
This is an optional field to indicate how much of a deposit a customer will be paying upfront. More details are covered in Section 8: Collecting Payments.
Automation Fields (DO NOT EDIT)
The following custom fields are managed automatically by Zoho automations. Sales reps should NOT edit these fields:
- Electronic Fee Added
- Deposit Collected
- Fee Original Total
- Fee Paid Amount
These fields are used by automations to calculate and track fees and deposit amounts.
Saving an Invoice
Invoices have more saving options than quotes:
| Save Option | What It Does |
|---|---|
| Save as Draft | Saves the invoice as a draft. Not visible to the customer until sent. |
| Save and Send | Opens the email interface (same as sending a quote) |
| Save and Send Later | Schedule a specific time/date for the invoice to be sent automatically |
| Save and Share | Saves the invoice and provides a shareable link for online viewing |
| Save and Print | Saves the invoice and sends it to the printer |
After Creating an Invoice
When viewing an invoice, you have similar options to quotes, plus these invoice-specific actions:
- Reminders: Set reminders for follow-up. You'll receive email notifications when the reminder triggers.
- Record Payment: Manually record a payment received (covered in Section 8)
- Collect EPayment / EDeposit: Process electronic payments or deposits (covered in Section 8)
Understanding Electronic Payment Fees
Patterson Print Shop charges a 3% fee on all digital transactions to cover credit card processing costs.
What Transactions Have Fees?
The 3% fee applies to any payment processed through our Stripe account:
- In-person debit/credit card payments
- Online debit/credit card payments
- Apple Pay
- Google Pay
How to Avoid Fees
The only way to avoid the fee is to use one of these payment methods:
- Cash
- Check
- ACH transfer
- Zelle
Remember to change the Payment Type field to "Cash / Check / ACH / Zelle" when using these methods!
How Fees Are Calculated
- Fees are calculated based on the invoice subtotal
- Fees apply to all transactions, including deposits - any time a card is swiped, the fee must be charged
- All fees paid count toward the total fee amount
- Fees are automatically recalculated when you edit an invoice (increase or decrease amounts)
Fee Timing and Visibility ⚠️ IMPORTANT
- After saving an invoice marked as "Electronic" payment type, the fee will be added automatically a few seconds later
- You may need to refresh the page to see the fee populate
- IMPORTANT: When saving an invoice, the fee might not be immediately present
- If you need to print or send immediately: Save and Print first, then Save and Send after the fee is added
- You CAN send invoices without the fee visible yet - by the time the customer receives the invoice, the fee will be present
- However: The fee will NOT be indicated in the email or PDF if sent before it populates - it will only be visible when the customer clicks the link to pay
Best Practice: Wait 5-10 seconds after saving an Electronic invoice, refresh the page to confirm the fee appears, then send to the customer. This ensures the fee is visible on both the PDF and the payment link.
8. How to Collect Payments
Zoho provides several methods for collecting payments from customers. Each method is designed for specific payment scenarios. This section covers when and how to use each payment collection option.
Payment Collection Methods Overview
There are three main ways to collect payment for an invoice in Zoho:
| Method | When to Use | Payment Type Required |
|---|---|---|
| Record a Payment | Cash, Check, ACH, or Zelle payments | Cash / Check / ACH / Zelle |
| Charge Customer | Customer provides card number without physical card | Electronic (Card or Online) |
| Collect EPayment / EDeposit | In-person card payment using card reader | Electronic (Card or Online) |
| Online Payments | Customer pays via portal or email link | Electronic (Card or Online) |
Recording Cash/Check Payments
Record a Payment Button
This button should ONLY be used for Cash, Check, ACH, or Zelle transactions.
- Set payment type: Ensure your invoice is set to "Cash / Check / ACH / Zelle" payment type
- Click "Record a Payment": This will bring up a form asking for payment information
- Fill out the form: Enter the payment amount, date, and method - the process is straightforward
- Save: The payment is recorded and applied to the invoice
Processing Card Payments (In-Person)
Charge Customer Button
This option should ONLY be used when the customer does not have a physical card present but is providing their card number over the phone or email.
- Allows you to process the card using the card number without the physical card
- Required: Invoice MUST be set to "Electronic (Card or Online)" payment type
- Transaction is processed through Stripe
- The 3% fee still applies (customer should be aware)
Collect EPayment Button (Card Reader)
This is a custom button that sends the invoice information to Stripe and triggers your card reader. This should be your default option for the majority of in-person card transactions.
How to use Collect EPayment:
- Ensure Electronic payment type: Invoice must be set to "Electronic (Card or Online)"
- Click "Collect EPayment": You'll see an "Are you sure?" popup
- Click Confirm: Proceed with the payment
- Wait for card reader: A moment later, the payment amount will display on your card reader
- Customer pays: Customer inserts, taps, or swipes their card
- Payment complete: The payment is automatically recorded in Zoho
Collecting Deposits and Partial Payments
Collect EDeposit Button
You can find this custom button by clicking the small down arrow next to "Collect EPayment".
This option works similarly to Collect EPayment:
- Sends payment information to Stripe and triggers the card reader
- By default: Charges 50% of the remaining invoice balance
- The 3% electronic payment fee applies to deposits
- The fee amount counts toward the total fee amount on the invoice
Custom Deposit Amounts
For custom partial payment amounts:
- Edit the invoice: Open the invoice for editing
- Enter deposit amount: Enter your custom amount in the "Deposit Amount" field
- Save the invoice: Save your changes
- Click "Collect EDeposit": The card reader will charge the custom amount you specified
Online Payments (Customer Self-Service)
Customers have the option to pay their invoices online without needing to visit the shop or call a representative.
How Customers Can Pay Online:
- Customer Portal: Customers can log into their portal and pay from the Invoices section
- Email Link: Any invoice email sent to customers includes a "Pay Now" link
Online Payment Details:
- All online payments are processed through Stripe
- The 3% electronic payment fee is included in all online payments
- Customers can pay with debit/credit cards, Apple Pay, or Google Pay
- Payments are automatically recorded in Zoho when processed
- Both you and the customer receive confirmation emails
9. Accountant Overview
Purchases, Banking, Filing and Compliance
This section is currently under development. The accounting features in Zoho use standard functionality for managing purchases, banking, filing, and compliance.
Detailed documentation for accountant-specific workflows will be added as our accounting processes are finalized.
What's Included in This Section
When complete, this section will cover:
- Purchases Management: Recording purchases, managing expenses, and uploading receipts
- Banking Integration: Bank feeds, reconciliation, and transaction management
- Filing and Compliance: Tax management, 1099 generation, and compliance reporting
- Chart of Accounts: Account structure and customization
- End-of-Period Tasks: Monthly, quarterly, and annual accounting procedures
For now, all these features are accessible through the standard Zoho interface at Accountant in the side navigation. If you need assistance with accounting features, please consult with your accountant or refer to Zoho's standard documentation.